
Prototyping on a Budget
- Andrea Schultz
- Sep 24, 2017
- 4 min read


There have been many webinars and courses that I have taken for Personal Development Hours (PDH) in order to continue my education out of the classroom, but the Prototyping on a Budget webinar has been one of my favorite so far. Presented by Ryan Vinyard inn under an hour, the course covered the basics of prototyping, such as different forms, the 7-7 rule, and injection molding versus urethane casting. In the next following paragraphs, I'll break down each topic and include some of my experiences with prototyping.
One of the main topics of discussion was the different forms or dimensions prototyping can come in: 2D, 3D, and 4D. 2D is known as the initial "napkin" sketch, a drawing or sketch made on paper or a white board. This is the starting point of any prototype, getting concepts to paper. The next type of prototype would be the conversion from paper to 3D. A 3D prototype includes any type of model, either physical or simulated, such as a 3D printing, a CAD model, or even cardboard/foam board assemblies. This is one of the fastest ways to create your prototype and interact with its functions or physical features. Finally, the other type of form would be a video of the product, illustrating its key features and highlighting its functions.
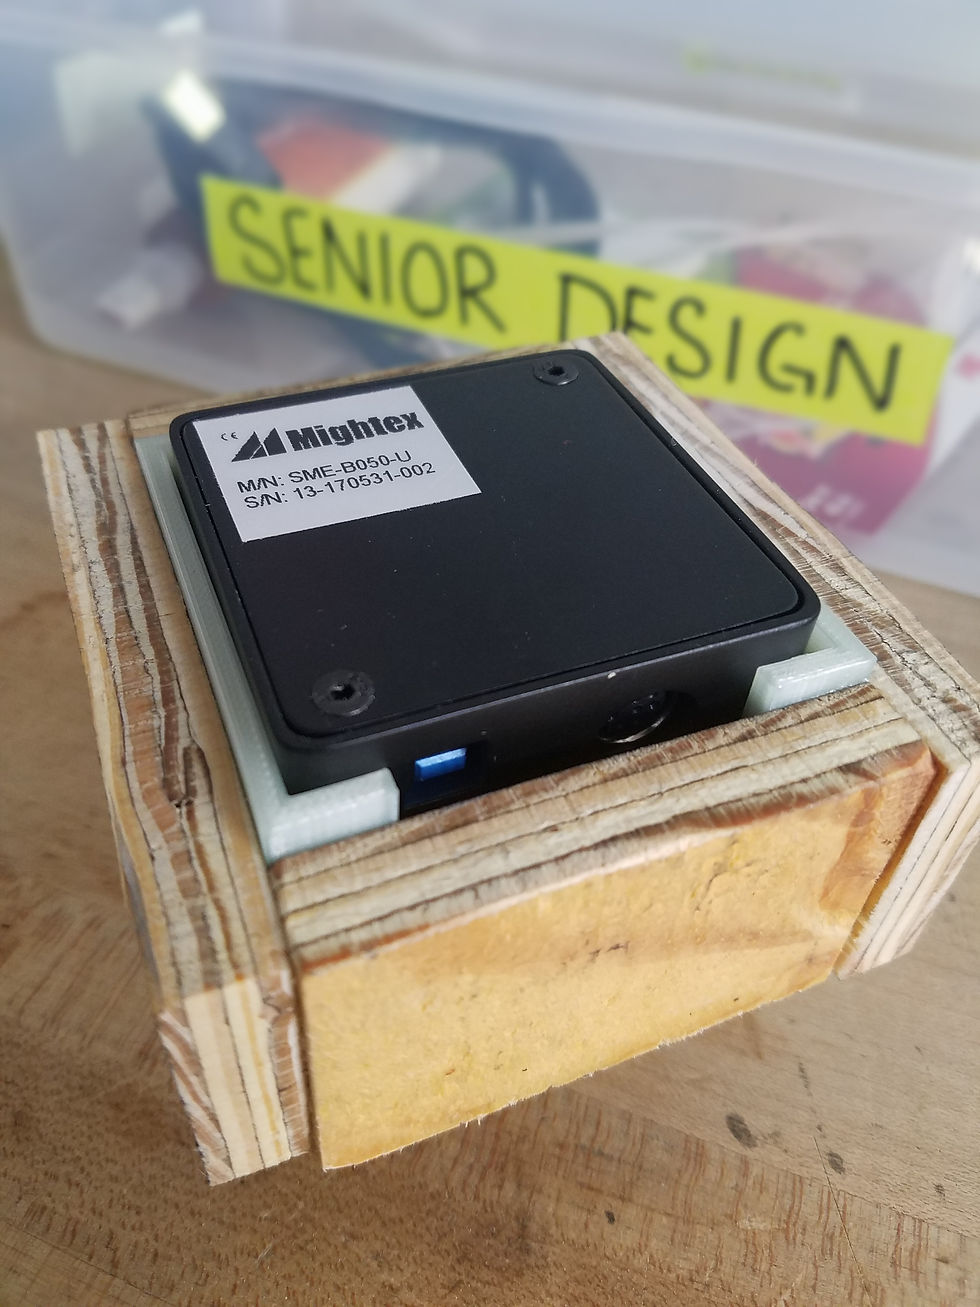
I have created many napkin sketches that have never even made it to the next stage, but that's not necessarily a bad thing. Coming up with concepts and putting them to paper is a must for any designer, but deciding what ideas to continue with is just as important. For ME 471 Senior Design Capstone, our previous project involved creating multiple prototypes in order to implement our design in the plant for testing. First sketches were created for multiple designs, then a single drawing was chosen to create a physical, 3D prototype. A model made from wood glue and aluminum foil took the shape of the actual end product, reducing the time to manufacture the actual metal pieces. Lastly, a final box was assembled along with the 3D printed component. Below you can see the iterations we went through to create this final prototype.


Another prototyping task for this class was to create a functional desk for a seating arrangement that only provided a small amount of work area. The metrics were created and after a week of research, ideas were sketched out and a cardboard prototype was assembled. What took us an hour of class time saved us hours of time on our final design, proving the point of the webinar: prototyping should focus on not only the function and attributes of the product, but also consider the cost and time spent on it. With our cardboard table physically in front of us, we began constructing our final prototype:

Our prototype captured all of the key functions of our product and even worked when in place. When presenting our design, we slid it onto the pre-existing table, spun it in the position most comfortable for the user, and presented the functionality of a kick stand for optimum support, a tray for storage, a large enough area for a laptop and a sheet of engineering paper, and a white board that covered the surface of the table. This prototype was submitted in 4D, highlighting the functions and feasibility of our design in under 30 seconds.
The second of three topics briefly covered was the 7-7 rule. Short and concise, this rule gives an idea of how long each prototype should take, for example:
Whiteboard - 7 seconds
Foamcore - 7 minutes
3D print - 7 hours
Prototype build - 7 days
Test cycle - 7 weeks
Manufacturing - 7 months
Lastly, injection molding and urethane casting were compared based on their cost, their benefits, and their downfalls. Injection molding has high setup costs, about $30k for a simple part, and high iteration costs. Although injection molding has a long lead time, about 6 weeks, it makes up for it with low unit costs, about $2 per part. Urethane casting, or silicone molding, has an inversely proportional benefit: low setup costs, about $100 for master parts, low iteration costs, and a short lead time (10 days.) Urethane casting is a good precursor to injection molding on a design for manufacturability standpoint, but ultimately has a high unit cost, about $50 per part. Depending on what is being fabricated, these are two options for a final and functional prototype.
Overall, the course highlighted three topics that I utilized in my capstone course, saving myself and my team time and future mistakes. By taking this course, provided by Engineering 4 Change, I am able to gain more insight in the prototyping in the design process.
"The Hardware Startup" is a recommendation from the presenter on furthering any entrepreneur or professional maker in the process of prototyping. A description from Amazon about the book can be found below, along with a link.

"Thanks to the decreasing cost of prototyping, it's more feasible for professional makers and first-time entrepreneurs to launch a hardware startup. But exactly how do you go about it? This book provides the roadmap and best practices you need for turning a product idea into a full-fledged business.
Written by three experts from the field, The Hardware Startup takes you from idea validation to launch, complete with practical strategies for funding, market research, branding, prototyping, manufacturing, and distribution. Two dozen case studies of real-world startups illustrate possible successes and failures at every stage of the process.
Validate your idea by learning the needs of potential users
Develop branding, marketing, and sales strategies early on
Form relationships with the right investment partners
Prototype early and often to ensure you're on the right path
Understand processes and pitfalls of manufacturing at scale
Jumpstart your business with the help of an accelerator
Learn strategies for pricing, marketing, and distribution
Be aware of the legal issues your new company may face"
Purchase this book on Amazon here.
Comments